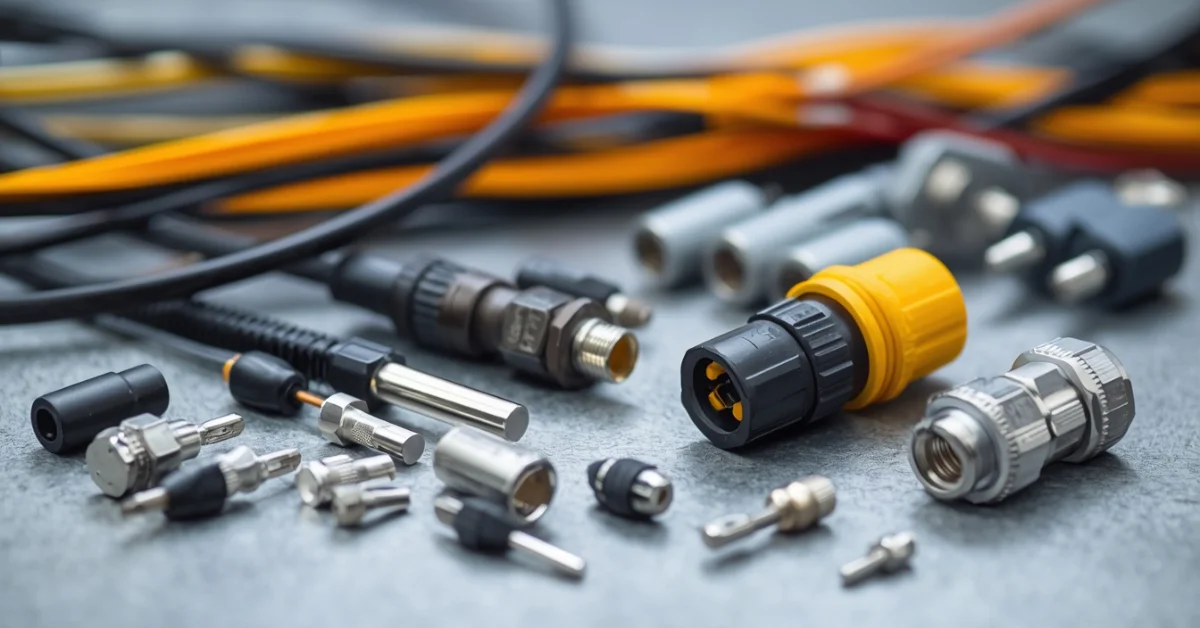
Want to know how to use wire connectors correctly and safely? Wire connectors are one of the most common electrical components used in US homes — but using the wrong type or installing them incorrectly can cause loose connections, electrical fires, or circuit failures. This complete guide shows you exactly how to use wire connectors, covers every major type available at Home Depot and Lowe’s, and gives you the safety steps that US electricians follow on every job.
What Are Wire Connectors?
Wire connectors (also called wire nuts, wire terminals, or electrical connectors) are devices used to join two or more electrical wires together safely. They create a secure, insulated connection without soldering — making them essential for home wiring, automotive electrical work, outdoor lighting, and virtually any DIY electrical project.
In the US, wire connectors must meet UL (Underwriters Laboratories) standards to be legally used in residential and commercial electrical work. Always look for the UL Listed mark on any wire connector you purchase.
Types of Wire Connectors — And When to Use Each
Choosing the wrong type of wire connector is the most common mistake DIYers make. Here are the main types available at US hardware stores:
1. Twist-On Wire Connectors (Wire Nuts)
The most common wire connector in US homes — you have seen these orange, yellow, and red plastic caps in every junction box. They work by twisting onto the wires, creating a tight mechanical and electrical connection.
- Best for: General household wiring — outlets, switches, light fixtures, junction boxes
- US brands: Ideal Industries Wire-Nut, 3M Scotchlok, Gardner Bender
- Available at: Home Depot, Lowe’s, Ace Hardware — typically $3–$8 for a pack of 25
- Color coding (Ideal Industries standard):
- Gray — very small wires, 22–16 AWG
- Blue — small wires, 2 conductors of 14 AWG
- Orange — 2–3 conductors of 14–12 AWG (most common for household use)
- Yellow — 2–4 conductors of 14–12 AWG
- Red — larger bundles, 3–5 conductors of 12–10 AWG
2. Push-In Wire Connectors (WAGO Connectors)
Push-in connectors have exploded in popularity among US electricians and DIYers. Instead of twisting, you simply push the stripped wire into the connector — it locks automatically with a spring mechanism.
- Best for: Quick connections, tight spaces, solid and stranded wire combinations
- Top US brand: WAGO 221 Series — available at Home Depot, Lowe’s, and Amazon ($15–$25 for 10-pack)
- Big advantage: Reusable — you can open the lever and remove wires for changes or troubleshooting
- Available in: 2-wire, 3-wire, 4-wire, and 5-wire versions
3. Crimp Connectors
Crimp connectors are used primarily in automotive wiring, marine applications, and low-voltage projects. They require a crimping tool to compress the connector onto the wire.
- Best for: Automotive wiring, trailer wiring, marine electrical, speaker wiring
- Types: Butt connectors (joining two wires end to end), ring terminals (connecting to bolts/screws), spade terminals (quick disconnect connections)
- Color coding: Red (22–18 AWG), Blue (16–14 AWG), Yellow (12–10 AWG)
- Available at: AutoZone, O’Reilly Auto Parts, Home Depot — $8–$15 for an assortment kit
4. Lever Nut Connectors
A premium version of push-in connectors with a visible lever. Popular among professional US electricians for their reliability and reusability.
- Best for: Professional installations, mixed solid and stranded wire, applications where you may need to disconnect later
- Top brand: WAGO 221 Lever Nuts — widely available at electrical supply stores and Amazon
5. Waterproof Wire Connectors
Standard wire nuts are not waterproof — for outdoor, underground, or wet location wiring you need waterproof connectors filled with silicone gel.
- Best for: Outdoor lighting, landscape wiring, underground wire splices, irrigation systems
- US brands: King Innovation Dryconn, 3M DBR/Y Direct Bury Connectors
- Available at: Home Depot, Lowe’s — $5–$12 per pack
What You Need Before You Start
- Wire stripper — Klein Tools or Irwin are the most popular US brands ($12–$25 at Home Depot)
- Voltage tester — Non-contact voltage tester like Klein Tools NCVT-1 ($15–$20). Essential for safety
- Wire connectors — correct type and size for your project
- Needle-nose pliers — helpful for holding wires while connecting
- Electrical tape — 3M Scotch Super 33+ is the standard in the US
- Safety glasses and work gloves
Step 1: Turn Off Power and Verify It Is Off
This is the most critical safety step — never skip it.
- Go to your electrical panel and turn off the breaker for the circuit you are working on
- Use a non-contact voltage tester on the wires before touching them — hold it near the wire and it beeps/lights up if voltage is present
- If the tester indicates voltage, go back to the panel and find the correct breaker
- Test again — only proceed when the tester confirms zero voltage
Important: In the US, most household circuits run at 120V or 240V — both can cause serious injury or death. Never assume the power is off without testing with a voltage tester.
Step 2: Strip the Wire Ends
Proper wire stripping is essential for a good connection:
- Use your wire stripper to remove 3/4 inch (about 19mm) of insulation from each wire end
- Select the correct notch on the stripper for your wire gauge — most household wiring is 14 AWG or 12 AWG
- The exposed copper should be clean, shiny, and undamaged
- If the copper looks nicked, cut it off and strip again — nicked wire is weaker and can cause connection problems
US Wire Gauge Reference:
| Wire Gauge | Common Use | Max Amperage |
|---|---|---|
| 14 AWG (white sheathing) | Lighting circuits, 15-amp circuits | 15 amps |
| 12 AWG (yellow sheathing) | Kitchen outlets, 20-amp circuits | 20 amps |
| 10 AWG (orange sheathing) | Dryers, AC units, 30-amp circuits | 30 amps |
| 8 AWG (black sheathing) | Electric ranges, 40-amp circuits | 40 amps |
Step 3: How to Use Twist-On Wire Connectors (Wire Nuts)
- Hold the stripped wire ends parallel to each other — all copper ends even
- Place the wire nut over the wire ends
- Twist the wire nut clockwise with firm pressure until it feels tight and will not turn further
- Give each wire a gentle tug — if any wire pulls out, the connection is not secure. Remove the nut, re-strip if needed, and reconnect
- The wire nut should cover all exposed copper — no bare wire should be visible below the connector
Pro Tip: Pre-twist the wires together clockwise with pliers before adding the wire nut — this creates a stronger mechanical connection that is less likely to loosen over time. This is standard practice among US electricians.
Step 4: How to Use Push-In Wire Connectors (WAGO)
- Strip 11mm (about 7/16 inch) of insulation — WAGO connectors require slightly less stripping than wire nuts
- Open the lever on the connector (for lever nut versions) or simply push straight in (for push-in versions)
- Insert the stripped wire end straight into the opening until it stops
- Close the lever (for lever nut versions)
- Give the wire a gentle tug to confirm it is locked
- The transparent housing on WAGO connectors lets you see the copper inside — verify the wire is fully inserted
Step 5: How to Use Crimp Connectors
- Choose the correct size crimp connector for your wire gauge — color coded red, blue, or yellow
- Insert the stripped wire end fully into the crimp connector barrel
- Position the crimping tool over the middle of the barrel
- Squeeze the crimping tool firmly — you should feel and hear the crimp compress
- For butt connectors joining two wires — crimp one end, then insert the second wire and crimp the other end
- For waterproof applications, use heat shrink crimp connectors and apply heat with a heat gun to seal
Step 6: Test Your Connection
- Visually inspect — no exposed copper should be visible outside the connector
- Tug test — pull each wire firmly. A good connection should not move
- Restore power at the breaker
- Test the circuit — turn on the switch, plug in a device, or use a multimeter to verify proper voltage
- If the circuit does not work, turn off power again and recheck your connections
US Electrical Code Requirements for Wire Connectors
According to the National Electrical Code (NEC), all wire connections in the US must:
- Be made inside an approved electrical box (junction box, outlet box, switch box)
- Use UL Listed connectors appropriate for the wire gauge and application
- Be accessible — connections cannot be buried in walls without a junction box
- Use connectors rated for the environment — waterproof connectors required for wet locations
Important: For any electrical work beyond simple fixture replacement or outlet swapping, check if your local municipality requires a permit. Major wiring work without a permit can cause issues when selling your home and may void your homeowner’s insurance.
Frequently Asked Questions
What is the difference between a wire nut and a WAGO connector?
Wire nuts (twist-on connectors) require you to twist the connector onto the wires — they are inexpensive, widely available, and the traditional standard in US homes. WAGO lever nuts use a spring-loaded mechanism that holds wires without twisting — they are faster to install, reusable, and increasingly preferred by professional US electricians. Both are UL Listed and NEC compliant.
Can I reuse wire nuts?
It is not recommended. Once a wire nut has been used and removed, the internal spring can lose tension and may not create as secure a connection the second time. WAGO lever nuts are specifically designed to be reusable — you can open the lever, remove the wire, and reconnect multiple times without losing connection quality.
How many wires can you put in a wire nut?
It depends on the size of the wire nut and the wire gauge. Most standard orange wire nuts handle 2–3 wires of 14 AWG or 12 AWG. Red wire nuts handle 3–5 wires of 12–10 AWG. Always check the manufacturer’s specification on the package — using too many wires in one connector is a fire hazard.
Do wire connectors need electrical tape?
For standard indoor applications with properly sized wire nuts, electrical tape is not required by the NEC — a correctly installed wire nut provides adequate insulation. However, many electricians add tape for extra security, especially in high-vibration environments. For outdoor or wet locations, always use waterproof connectors — electrical tape alone is not a substitute.
What gauge wire connectors do I need for household outlets?
Most US household outlet circuits use 12 AWG wire (on 20-amp circuits) or 14 AWG wire (on 15-amp circuits). For these, standard orange or yellow wire nuts work perfectly. If you are unsure of your wire gauge, look at the wire sheathing — yellow means 12 AWG, white means 14 AWG in most modern US homes.
Use Wire Connectors Safely and Confidently
Now you know exactly how to use wire connectors for any electrical project — from basic household wiring with wire nuts to automotive crimp connectors and professional WAGO lever nuts. Always start by turning off power and verifying with a voltage tester, choose the right connector type and size for your application, and make sure every connection is UL Listed and NEC compliant. When in doubt about any electrical work, consult a licensed electrician — it is always better to be safe.